

How To Use Killdisk For Windows
Agile@ KillDisk tin can completely and securely destroy all data on hard drives, removable disks, and flash media devices, without the possibility of futurity recovery. U-Yard has a license for its use past faculty, staff, and departments for U-M owned computers on all U-M campuses, including Michigan Medicine. This document provides instructions for downloading, installing, registering, and using the U-M licensed copy of Active@ KillDisk. This copy may be used at no cost for an unlimited number of uses on U-M owned devices.
A freeware version of Active@ KillDisk is available for use on personally owned devices.
Use of KillDisk post-obit these instructions will satisfactorily ready devices for resale or disposal past U-M Holding Disposition, and complies with university policies and standards for securely disposing of data and devices. Run across Securely Dispose of U-Chiliad Data and Devices for more information on securely disposing of data and devices, including other device types. This procedure can be used on computers running diverse operating systems (Mac, Windows, Unix/Linux), and most device types (Mac and Windows PC devices, USB and external drives), and too meets the Information Assurance requirements for erasing solid land drives (SSDs).
Of import! To avoid charges when devices or storage media are turned over to Property Disposition for disposal or resale, you must erase your device using @Active KillDisk by following the instructions beneath. This must include using the fingerprint option, and/or generating a Certificate of Destruction to be attached to the device as verification that KillDisk was run on that device.
Download and Install
Follow these instructions using a Windows computer with Intel Pentium or higher, 1 GB of RAM, Video VGA resolution 800 x 600 or improve, and Windows seven or higher. A bootable USB drive, 1GB or larger in size is recommended for creating kicking media. The bootable medium y'all create in this procedure tin can be used on all devices, regardless of operating arrangement of the device being erased.
- Download the U-M licensed version of Active@ Killdisk from the U-Thou DropBox location.
- Run the KillDisk-Ultimate-Setup.exe file downloaded from the U-M DropBox folder.
- Click Next on the initial Welcome and Setup Sorcerer screens.
- Select I accept the agreement to agree to the licensing terms, and click Adjacent.
- Click Adjacent to accept the default install location (the Program Files directory) or define a custom install location if needed.
- Uncheck the Launch Universal Boot Deejay Creator when the install process ends.
- Click Terminate.
Register on First Use
Yous must register Active@ KillDisk earlier offset use.
- Click Registration.
- Using the information downloaded from the U-K DropBox location, copy and paste your registration data and the registration primal into the registration form.
- Click OK to verify registration information, and store this information locally so you volition non need to enter information technology the next fourth dimension you launch the application.
Check for Updates Before Using
The Active@ Killdisk programme will need to be updated periodically to make certain you are using the current version. Run the check below earlier use to be sure your re-create is upwardly to date.
- Launch the Active@ KillDisk programme.
- Click the Help card, and select Cheque for updates.
- A window will open indicating the status and current version of Active@ KillDisk.
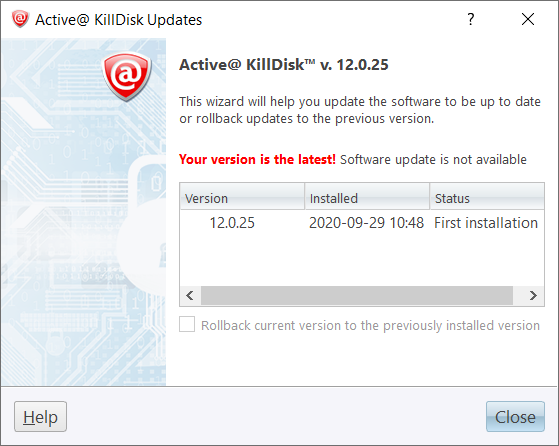
- Click Cancel if an update is not needed, or click Update if an update is needed. If an update is needed, KillDisk will download and install it, and so close automatically when finished.
Prepare Bootable Media
Yous will need to ready a bootable device in order to erase a complete drive on a machine where the drive is installed internally. We recommend that yous use a USB device, 1GB or larger in size. You can select other bootable media if needed, including a CD/DVD/Blu-ray disk, a USB Flash Drive, or an ISO Image file to be burned later. Agile@ KillDisk as well offers the ability to erase an external difficult drive, as well equally specific partitions and empty space on a drive.
To prepare a bootable device:
- Run Bootable Disk Creator from the Windows Start menu. The Active@ Boot Deejay Creator main page appears.
- Select the USB drive you wish to use on the Active@ Kick Deejay Creator main page. If your USB is not displayed in a philharmonic-box, yous may need to initialize it.
- Click Next.
- Select the target platform for booting up: Windows, Linux GUI, Linux Console or DOS.
Erase a Hard Bulldoze
- Boot the calculator you will exist erasing using the bootable USB drive you created, and open Active@ Killdisk.
- Select the appropriate drive and partitions yous would like to erase, well-nigh likely stock-still Disk0 for a computer's internal hard bulldoze. Click Erase Deejay.
Important! Pay close attention to selecting the disk to exist erased. Do not proceed until you are certain the selected deejay is the 1 you want to erase.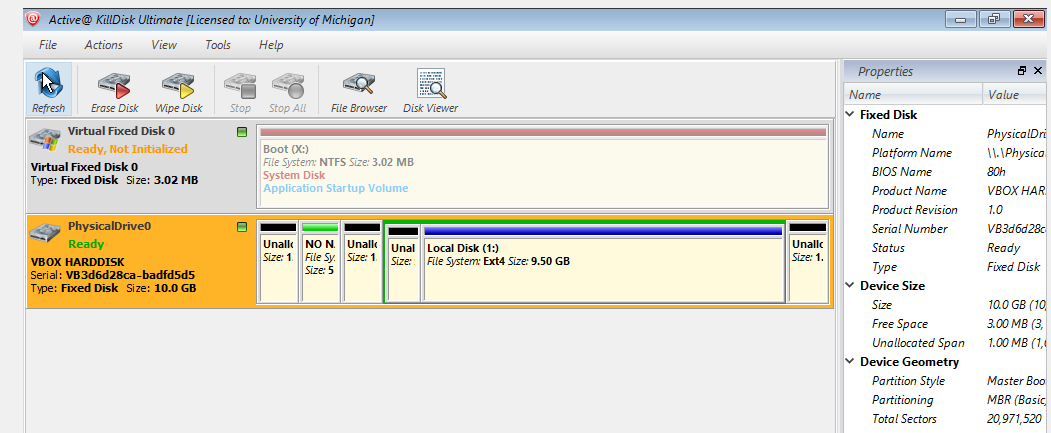
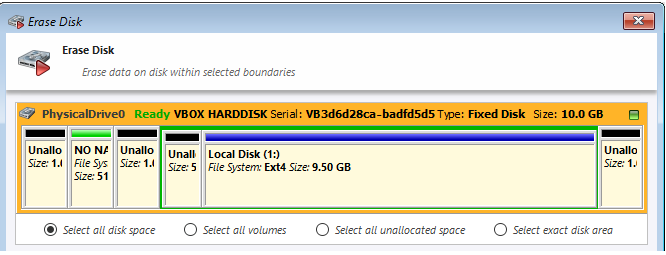
- Double check your selection in the Erase Disk pop up window. If correct, proceed to step 4, if incorrect, modify the selections.
- Select NIST 800-88 (one laissez passer random) in the Erase Method pane of the Kill pop upwardly window.
Notes:- This meets U-K Information Assurance criteria for secure erasure of data classified up to Restricted.
- If you have a contractual requirement to perform more passes, select a dissimilar method every bit appropriate.
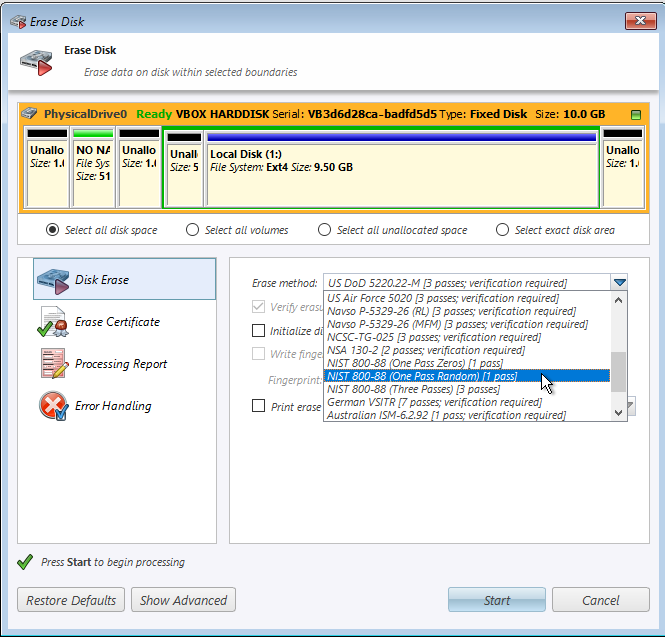
- Leave the verification selection at 10%.
- Check the Initialize disk(southward) subsequently erase box.
- Check the box Write Fingerprint to first sector.
Notation:Choosing this pick writes an acknowledgement to the disk upon completion of KillDisk stating that Agile@ Killdisk has successfully erased the deejay. This choice meets the requirements of U-M Property Disposition to avoid sanitization fees for the disposal of digital media.
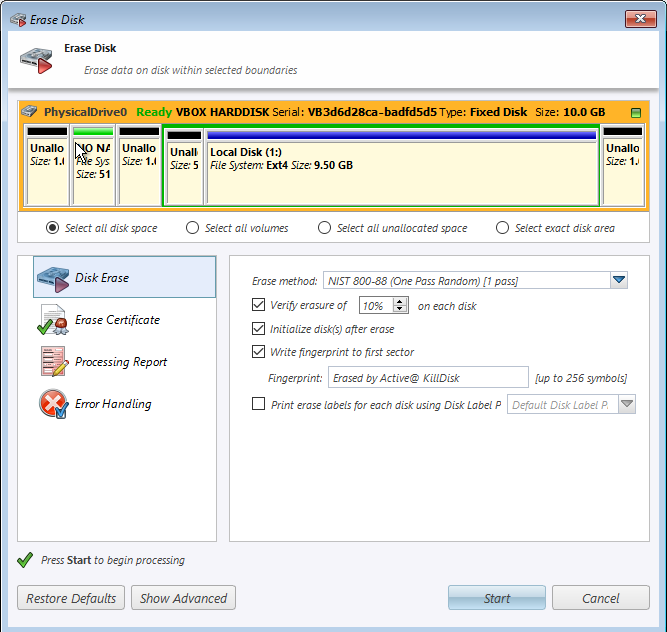
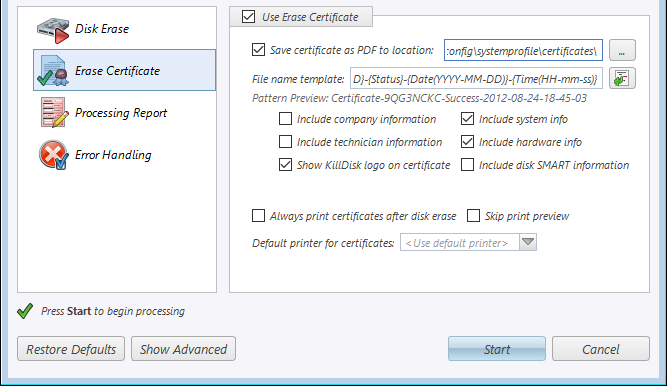
- Killdisk automatically saves a PDF re-create of the Certificate of Destruction to the USB drive to "(USB drive letter) :\Windows\System32\config\systemprofile\certificates".
To change the save location of the PDF file, select the Erase Document from the left bill of fare. From here, change the file path listed in the "Relieve certificate as PDF to location" box (or click on the button to the right of the text box select the directory location).
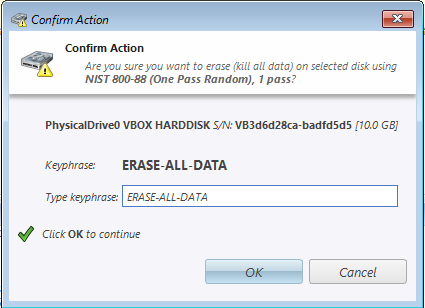
- Click Start.
- Confirm action by typing ERASE-ALL-DATA in the Confirm Action window. Click OK.
Salve the Certificate of Destruction (C.O.D)
One time the sanitization procedure has completed, Active@ KillDisk will produce a document containing the date, information about the disk, a sanitization status of pass or neglect, and a verification status.
The process should have already saved a re-create of the COD to
(USB drive alphabetic character):\Windows\System32\config\systemprofile\certificates". To save another re-create to the same, or different location:
- From the erasure completion page popular upward window, click on the Print button.
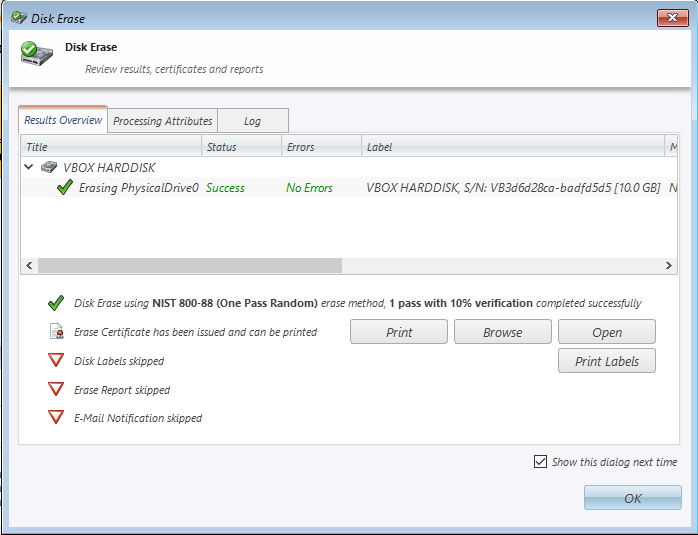
- This will bring up a print preview window of the PDF to exist saved. From here click on the print button. This will so allow you to select the location to relieve the copy of the COD.
- Before the save button can be used, a file name will need to be provided. Choose a filename that makes sense for you, such equally the workstation name or asset tag number and the date. Then click Save.
A copy of the C.O.D must be provided along with Declaration of Surplus form and provided to U-M Property Disposition for resale or disposal. Property Disposition prefers electronic versions of both documents. Y'all should besides retain a re-create of the certificate for your records. Some regulations and contractual agreements may crave you to have this certificate to testify compliance.
Source: https://documentation.its.umich.edu/node/478
Posted by: hatcherdeconsenry.blogspot.com
0 Response to "How To Use Killdisk For Windows"
Post a Comment